
There are several reasons why clipping and layer masks are important, but before going in-depth, here’s a tutorial on how to create a clipping mask in Photoshop.
Photoshop gives you a variety of editing options, and if you’re new to Photoshop, figuring out the details and tools can take some time. For example, creating a clipping mask and layer mask might seem like advanced editing, but our tutorial breaks it down for you, and even if it’s your first time using Photoshop, we’re pretty sure you can get it!
Before getting into the tutorial, let’s learn some details about Photoshop Clipping Masks and Layer Masks.
Have you ever wondered if you could hide or reveal parts of your layer instead of permanently erasing them? Yes, layer mask does the same for you.
However, layer masks enable you to hide or show parts of layers whenever you want and cannot delete such as image layers, shape layers, text layers, etc. A very effective way to work without missing any editing steps for any type of graphic design.
Why Clipping Paths Are So Important for Digital Photos Creating clipping masks in Photoshop may seem a little intimidating at first, but consider this.. Still, as time goes by and you get some basic understanding of the tool, it will make you want to use these features and Photoshop elements more often.
There are three main masking techniques to use in Adobe Photoshop.
Pixel layer mask
Clipping mask
Vector mask layer
1. Pixel layer mask
To control the transparency or opacity of a specific layer, Pixel Layer Mask helps you do this. This Photoshop element is mainly used by professionals while working with portraits, products, cars, etc.
2. Clipping Masks
The basic idea of creating a clipping mask is to clip both the top layer and the bottom layer to the Layers panel, a very creative way to combine photographs and images and give amazing results. A clipping mask can be used to mask all types of layers.
3. Vector Layer Mask
For objects with hard edges, a vector layer mask is highly recommended.
There are several ways to choose to edit an image in Photoshop, for example, remove the image’s background or similar edits.
For this, vector layer masks are useful because they are precise using paths and vector masks.
Understanding layers in Photoshop will help you with many things and editing techniques and methods Layers are one of the most important elements to working with Photoshop, and having a basic understanding is essential.
Clipping masks in Photoshop are a powerful way to control the visibility of a layer.
Layer masks are similar in meaning, but the end result can look the same and work very differently.
A layer mask uses black and white to show and hide different parts of a layer. But a clipping mask uses the content and transparency of one layer to control the visibility of another layer.
So to create a clipping mask, we need 2 layers.
The lower layer controls the visibility of the upper layer. In other words, the layer below is the mask, and the layer above it is the layer clipped to the mask.
Where the lower layer contains the actual content (pixels, size, or type), the layer’s content above it is visible. But if any part of the lower layer is transparent,
the same part of the upper layer will be hidden. This may sound more confusing than how layer masks work, but clipping masks are just as easy to use.
We create a clipping mask ourselves to better understand how it works.
Step 1: Open Adobe Photoshop and your image.
In this tutorial, I’ll show you how to use clipping masks in Photoshop to show and hide different parts of a layer and fit the image to size!
We’ll learn the basics of how to create a clipping mask, and we’ll explore the concept behind them in more detail so that by the end of this lesson,
you’ll have a solid understanding of how clipping masks work. I will explain how to use Photoshop cc but everything can be fully compatible with Photoshop cs6 and earlier. Let’s start!
Step 2: A mask layer and a clip layer
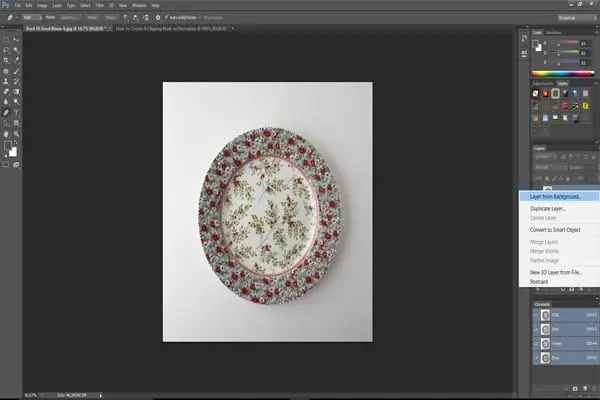
If we take a look at the Layers panel, the background layer photo will show a wall in the current document. To create a clipping mask we need two layers, one to serve as the mask and one that will be clipped to the mask, so let’s add a second layer.
We will add a new layer below the image. First, unlock the background layer. Double click the icon to edit it using Photoshop cs5. In Photoshop CS6 or earlier, press and hold the Alt (Win) / Option (Mac) key on your keyboard and double-click the background layer.
This makes the background layer Allah and is named After 0 Add a new layer below the consecutive images Press and hold Control from your keyboard and click on the Add New Layer icon:
We’re working under a new Lea image called Layer One, and we now have two Leas showing up here. We’ll make the bottom layer a mask and the image above it will be clipped to the mask.
Knowing Clipping Masks: Content and Transparency
Hide the original image momentarily by clicking the top layer visibility icon:
Closing the top layer, we see the layer we just added. By default, new layers in Photoshop are blank, meaning they have no content
A layer with no content is transparent and we can see through it. When there are no other layers underneath a transparent layer,
Photoshop displays the transparency as a checkerboard pattern, as we see here.
Turn the top layer back on by clicking the visibility icon again.
The top level contains the actual content. In this case, it’s pixel-based content because we’re looking at a digital photo,
but in Photoshop, content can be vector shapes or even text. Indeed, something that is not transparent is considered content.
When to Use Clipping Masks
While layer masks are best for blending layers with seamless transitions, clipping masks in Photoshop are perfect when you need to fit your image into a clearly-defined shape.
The shape can be something you drew with a selection tool as we saw.
But a clipping mask can be used to fill a vector shape with an image or to place an image inside text. As another example of what we can do with clipping masks,
let’s quickly look at how a clipping mask can be used to place an image inside a frame.
Placing an image in a frame with a clipping mask
Here I have a document that contains two images, each on a separate layer. Bottom-level photos have frames.
And if I click on the top layer’s visibility icon and turn it on. We see the image we want to place inside the frame. I’ll hide the top layer momentarily by clicking on its visibility icon,
and then I’ll click on the background layer to select it.
Select drawing or shape
I mentioned that clipping masks work best when your image needs to fit into a shape. Since the area inside the love of this shape is filled with solid black,
we’ll select it using Photoshop’s Magic Wand tool. I’ll click inside the frame with the Magic Wand Tool, and now the area is selected.
Then, I’ll copy the selected area to a new layer by going to the Layers menu in the menu bar, selecting New, and then selecting Layer by Copy.
Photoshop copies my selection to a new layer between the background layer and the image I’ll place inside the frame. I now have the shape to create my clipping mask.
A quick way to create a clipping mask
To create the clipping mask, I’ll select the top layer, and I’ll turn the layer back on by clicking on its visibility icon.
We’ve seen that we can create a clipping mask by choosing Create Clipping Mask from the Layers menu. But a quick way is to press and hold the Alt (Win) /
Option (Mac) key on your keyboard while you move your mouse cursor between the two layers.
Your cursor will change to a clipping mask icon. Click on the dividing line between the two layers to create a clipping mask. With the clipping mask created,
the photo will now only appear inside the frame, since that’s the only part of the photo that sits above the actual content on the layer below it. The rest of the photo is hidden because it sits on top of the transparency.
Resize content within a clipping mask
Finally, we saw that we can move content inside a clipping mask using the Move tool. But we can resize the content within the clipping mask using Photoshop’s Free
Transform command. Right now, my photo is too big for the frame, so I’ll resize it by going to the Edit menu and choosing Free Transform. Photoshop Free Transform places boxes and handles around the image, including the outside of the frame that is currently hidden by the clipping mask.
To resize it, I’ll hold down my Shift key as I click on the corner handles and drag them inward. . Holding the Shift key locks the image’s aspect ratio so I don’t distort it. To accept this, I press Enter (Win) / Return (Mac) on my keyboard to close Free Transform.
And now, thanks to the power of the clipping mask, the photo fits neatly into the frame. And there we have it! How clipping path works in Photoshop cs6 How to use a clipping mask to show and hide different parts of a subject-object layer.

