

Everyone involved in image editing work should have a clear understanding
of clipping paths. But unfortunately, most of us have no idea about it. That’s why we can’t take advantage of the clipping path
service. But hopefully, you don’t have to stress about it. Because you are now in the perfect place. In this article, I will show
you all the necessary information to draw a path in Photoshop.
What is a Clipping Path?
The first thing you need to know is the definition of clipping path. In a
word, the clipping path is the method of separating a specific object from its original background. Circulation is
performed by creating a vector layer on the side of the dropped object.
Importance of Clipping Path Service in Digital World:
In the digital age world, do you see me where images are not used? Not
only in our virtual life but also in real life the use of images is noticeable. Images are being used equally everywhere.
But you have to maintain some requirements when using images everywhere. Also, there are certain conditions to be
maintained for uploading photos to websites. In this case, the clipping path comes first among the services So you need to
know more about the clipping path service for your image editing work. Otherwise, you need to search for the best clipping
path service provider.
Path making process
Creating clipping paths in Photoshop is not that difficult. However, there is
one tool that you need to learn to control when clipping and that is the Pen Tool. So now, let me show you step by step how you can create a clipping path in Adobe Photoshop.
Step 1: Open Image

Step 2: select the tool
Go to the Toolbar menu and select the Pen tool.

Step 3: Create Anchor Point

After taking the pen tool, you first need to zoom in on your image to see the edges clearly. You should keep it around 300%. This will help you draw the path correctly. Now, start pointing at the edge of the object you want to cut. These points are called anchor points. Continue until you reach the starting point. When cutting from one object to another, you need to be careful about the edges to give it a natural look. So identify as accurately as possible.
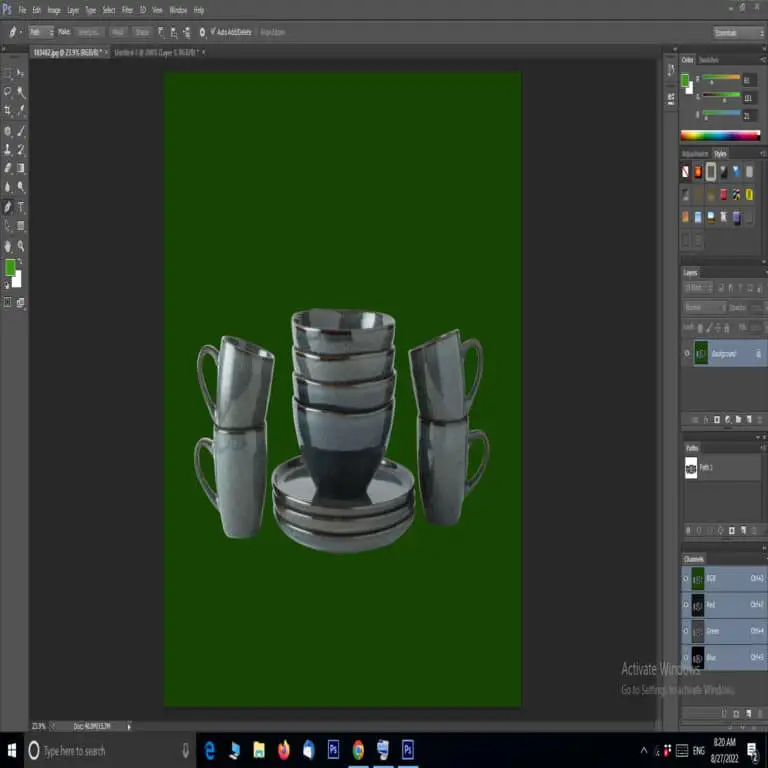
Step 4: The path inside the product

There is another empty space inside the picture I took. So we need to create another path inside it.
Step 5: Save paths
After you’re done marking, go to the Layers panel and select the Paths tab. Then, go to the top left corner menu and choose the save path. And name the path ‘Path 1’.
Step 6: Clipping Path
Go to this menu bar and select Clipping Paths.
A box will pop up showing some options. For example, calculates the closeness of the clipping path to the edges of the image. So, it determines the smoothness of the image.
If the flatness value is increased, it blurs the edge. Conversely, if the value is low, the edge will be smooth and sharp.
Step 7: Save photo

Step 8: Make a copy of the background layer from the Layers panel and copy the layer mask. Select a solid color layer in the middle position.
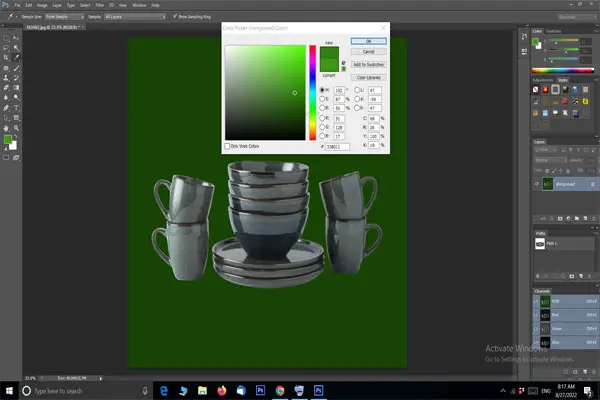
Step 9: Done! You have successfully created a clipping path for your image Please note that you can use any color you like as per your requirement.
Why is clipping path important?
Clipping paths are in high demand due to the growing number of online businesses and the advertisement of various products to look attractive to the eyes of customers.
The clipping path helps to draw attention to the product displayed on the website, giving priority to the customer to purchase the product. Large companies like Amazon, eBay, Walmart, and other e-commerce businesses rely heavily on clipping path solutions for their product images.
Clipping paths are in high demand for various industries. Most of the time sectors include the fashion industry, electronics companies, toy companies, jewelry companies, marketing companies, and architecture and interior design businesses are very important users in this field.
Apart from this, clipping paths have a wider reason and purpose to serve. For example, clipping paths are used in graphic design, web image optimization, banner designing, and other tasks.
Every designing expert needs to create a clipping path for their work as it is a part of their daily work.
Isolated parts of an image, background removal and clipping paths are widely used for various purposes. It is an essential part of designing, and therefore, it is a wise decision to do the job as a professional.
The clipping path must be correct to make your image look beautiful, and therefore, is recommended as the number one choice by experts.
If you want a reliable clipping path service, contact us and get the best photo editing service for your business We prioritize providing the best clipping path services and never compromise on quality.
Create a Clipping Path in Photoshop [2022]
Clipping paths are powerful tools that allow you to remove or “clip” an item or product from its background when other methods won’t work. This method is especially useful when you have a product that features a complex or multicolored background.
How do you create a clipping path in Photoshop?
Step 1: Set up your Pen tool
You need to know how to use the pen tool in Photoshop to create clipping paths. If you’ve ever used the pen tool in Adobe Illustrator, you’ll notice that Photoshop’s pen tool looks almost identical. Whether Photoshop or Illustrator software is set correctly, you create a clipping path and it depends on the shape.
In your image document, select the Pen Tool. You know it’s very easy to find it in the toolbar or you can choose it automatically and the pen tool will show up on your screen just by pressing type p from the keyboard. If you can’t see the Pen Tool, it can be hidden behind the Free From Pen Tool Curvature Pen Tool. You must find one with your own skills. Tool, or the Convert Point Tool.
At the top of the application window, in the Options bar, you’ll see the Pen tool’s settings. Select “Path” and select “Merge Shapes”. See the image below for reference.
Step 2: Draw a path around your product
If you want to experiment with how the pen tool works, it should be straightforward to draw a path around the shape of your photo. If you’re new to the Pen Tool, we’ll walk you through the basics
to get started with this powerful tool. Pen Tool Tutorial | Photoshop for e-Commerce Brands With your pen tool, click your mouse once along the edge of the image you want to “click again to place the next point but don’t release the mouse button yet. Instead,
drag the mouse along the edge of your object to create a curved path. Once you are satisfied with the shape of the curve, you can release the mouse button.
Continue along the edges of your object like this until you create a path around the object. To complete the path, rotate your pen tool around the starting point until you see a circle right next to the pen tool. That’s your cue that you’re about to turn off the path. For the first point, you must take the foot off. If you want to modify or alter the path by adjusting any of the points you’ve placed, you can do so using the Direct Selection tool.
4 Photoshop and clipping path shortcuts for bookmarking
Step 3: Save your path
Now if you are convinced of the sin you have created, go to the Photoshop 2022 panel. If you don’t see the panel, you can choose Windows > Paths to bring up the Paths panel.
Once in the panel, click on the task path you just created (if it’s not already selected). Then click on the panel menu and select Save Path. Tip: Give your new path a name that identifies the object it outlines This is a good practice because you may find yourself working on a file that requires multiple clipping paths.
Step 4: Create a clipping path
Historically, a reliable clipping path is a way Photoshop creates an image that gives you a more perfect result than other applications. For example, you can create a clipping path around a product image in Photoshop without damaging your original image, and then import that image into design software like InDesign or Illustrator, and the background of your image will automatically be “clipped.”
For this step, we’ll go over how to create a clipping path in the “traditional” way. In the next step, you’ll learn how to use the path you
created to move a background directly in Photoshop. To create a traditional clipping path, simply click on the saved path you created in the Paths
panel. Click again on the Panel menu and select Clipping Path. You won’t see any difference in your Photoshop document, but if
you save your image in a PSD file format and then place that image into InDesign or Illustrator, you’ll see the clipping path do its job.
Step 5: Create a selection from your clipping path
For e-Commerce use, you’ll probably need to completely remove the background from your product image in Photoshop. And now that you’ve made your way, the next part is easy. First, make sure
you’re at a level you can edit appropriately. Go to your Layers panel. If you can’t see the channel then of course you can select Window from the dropdown menu above the application window. You should make sure that the layer containing your
product image is not locked to facilitate working. If your image is on a locked background layer, double-click the layer to make it layer 0. Click OK. Make sure your new page is selected by looking in your Photoshop Paths panel. Then, from the panel menu, choose Select.
Check and make sure the feather radius is set to 0. Click OK. Now, select Select > Change > Agreement from the
dropdown menu at the top of the application window. In the dialog box that appears, set the Contract Radius to 1. Click OK. By
doing this, you’ll move your selection slightly inward, so you won’t show any background artifacts in your masked image.
Step 6: Create a clipping mask
For this next step, you need to go back to your Layers panel.
Make sure the layer containing your product image is selected in your Layers panel. At the bottom of your Layers panel, you’ll
see a small icon that looks like a black rectangle with a circle cut out in the middle – the Add Layer Mask icon. Click on that icon.
Now that you’ve created a layer mask that will separate your product image from the background, you need to use it as
a destructive way to separate the product image. Your original background is still there in case you need it in the
future, but it’s now masked. You can easily place another background below your layer 0 to place your product in a different setting or leave it on a
transparent background. Don’t have enough time or patience to handle clipping paths yourself? Outsource them to
.your Virtual Clipping Path Studio

